Tight hamstrings are a common issue, especially if you sit a lot or exercise intensely. They can lead to discomfort, lower back pain, and even injuries like strains or tears. Yoga offers a safe, effective way to lengthen these muscles, improving mobility and reducing pain.
Benefits of Yoga for Hamstrings
Stretching your hamstrings with yoga not only boosts flexibility but also enhances overall body balance. It can alleviate lower back and knee pain, improve posture, and make daily activities like walking or running feel easier. Consistent practice is key to long-term results.
Physical and Mental Benefits
Beyond physical relief, yoga promotes relaxation and mental clarity. It reduces stress, which can contribute to muscle tension, and fosters a mind-body connection that enhances your overall well-being.
Top 10 Yoga Poses to Loosen Your Hamstrings
Here are ten beginner-friendly yoga poses designed to target tight hamstrings, complete with step-by-step instructions and pro tips to maximize their effectiveness. Always warm up with gentle movements like leg swings or a short walk before starting.
1. Downward Facing Dog (Adho Mukha Svanasana)
This classic pose stretches the hamstrings, calves, and back, making it a full-body release. It’s perfect for beginners and seasoned yogis alike. Gravity helps deepen the stretch without forcing it.
- How to Do It: Start in a plank position. Push your hips up and back to form an upside-down V. Keep your knees slightly bent if your hamstrings are tight. Pedal your feet to ease into the stretch, holding for 5-10 breaths.
- Pro Tip: Focus on lengthening your spine rather than forcing your heels to the floor. This ensures a safe, effective hamstring stretch.
- Props: Place your hands on blocks if your shoulders feel strained.
2. Standing Forward Fold (Uttanasana)
This pose uses gravity to gently stretch the hamstrings and calves. It’s simple yet effective, and you can modify it to suit your flexibility level. It’s great for a quick stretch between meetings.
- How to Do It: Stand with feet hip-width apart. Hinge at your hips, letting your upper body hang forward. Bend your knees as needed to avoid lower back strain. Rest your hands on the floor, shins, or blocks for 5-10 breaths.
- Pro Tip: Engage your quads to help your hamstrings release. Relax your neck to avoid tension.
- Props: Use blocks under your hands if the floor feels too far.
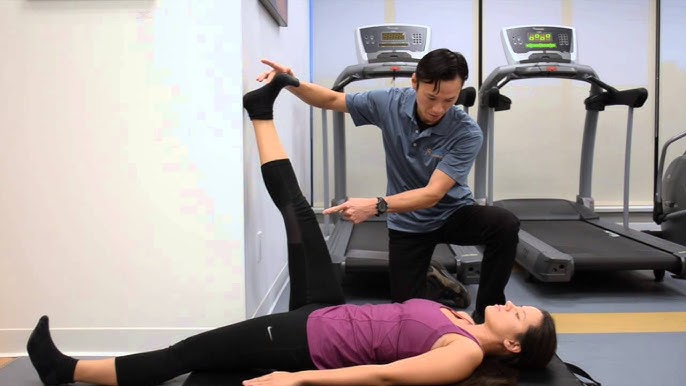
3. Reclining Hand-to-Big-Toe Pose (Supta Padangusthasana)
A gentle, supine stretch that’s ideal for beginners, this pose allows you to control the intensity using a strap. It’s perfect for stretching without straining your back.
- How to Do It: Lie on your back. Loop a strap around the ball of your right foot and extend your leg toward the ceiling, keeping your left leg grounded. Hold for 5-10 breaths, then switch sides.
- Pro Tip: Keep a slight bend in your lifted leg if your hamstrings are tight to avoid overstretching.
- Props: A belt, scarf, or towel works if you don’t have a yoga strap.
4. Half Splits (Ardha Hanumanasana)
This kneeling pose preps your body for deeper stretches like full splits. It targets one hamstring at a time for a focused release. It’s great for athletes easing into flexibility training.
- How to Do It: From a low lunge with your right foot forward, shift your hips back and straighten your right leg. Flex your right foot and keep your hands on the ground or blocks. Hold for 5 breaths, then switch.
- Pro Tip: Keep your back straight to maximize the hamstring stretch and protect your spine.
- Props: Use a blanket under your knee for comfort.
5. Wide-Legged Forward Fold (Prasarita Padottanasana)
This standing pose stretches both hamstrings and hip flexors, promoting balance and mobility. It’s a great option for those who find seated stretches challenging.
- How to Do It: Stand with feet wide apart, toes slightly inward. Hinge at your hips and fold forward, placing your hands on the floor or blocks. Hold for 5-10 breaths, keeping your legs straight but not locked.
- Pro Tip: Keep your weight balanced between the balls and heels of your feet to avoid straining your hips.
- Props: Blocks under your hands make this pose more accessible.
6. Triangle Pose (Trikonasana)
This side stretch opens the hamstrings, hips, and spine, offering a multi-dimensional release. It’s ideal for building strength and flexibility simultaneously.
- How to Do It: Stand with feet 3-4 feet apart, right toes facing forward, left toes at a 45-degree angle. Extend your arms into a T, hinge at your right hip, and reach your right hand toward your shin or a block. Hold for 5 breaths, then switch.
- Pro Tip: Engage your core to maintain stability and avoid collapsing into the stretch.
- Props: A block under your lower hand helps maintain alignment.
7. Seated Forward Bend (Paschimottanasana)
This calming pose stretches the hamstrings, calves, and back. It’s perfect for relaxing at the end of the day, even while watching TV.
- How to Do It: Sit with legs extended. Inhale, lengthen your spine, and exhale, hinge at your hips to reach for your shins or feet. Use a strap if needed. Hold for 5-10 breaths.
- Pro Tip: Sit on a folded blanket to tilt your pelvis forward, easing lower back pressure.
- Props: A strap around your feet helps close the gap if your hands don’t reach.
8. Low Lunge (Anjaneyasana)
A dynamic hip opener that also stretches the hamstrings, this pose is excellent for runners and cyclists. It strengthens while it stretches, promoting balance.
- How to Do It: From a tabletop position, step your right foot forward, aligning your knee over your ankle. Drop your left knee to the floor and push your hips forward gently. Hold for 5 breaths, then switch.
- Pro Tip: Keep your shoulders open to avoid hunching, maximizing the stretch.
- Props: A blanket under your back knee adds comfort.
9. Gate Pose (Parighasana)
This side stretch releases tension in the hamstrings, hips, and lower back. It’s a unique way to approach tight hamstrings from a lateral angle.
- How to Do It: Kneel with your thighs perpendicular to the floor. Extend your left leg out, toes pointing up. Slide your left hand down your leg and raise your right arm overhead. Hold for 5-10 breaths, then switch.
- Pro Tip: Keep your hips aligned with your kneeling knee to avoid twisting your pelvis.
- Props: A blanket under your knee prevents discomfort.
10. Head-to-Knee Pose (Janu Sirsasana)
This seated stretch targets one hamstring at a time, offering a deeper, more focused release. It also provides a gentle spinal twist for added mobility.
- How to Do It: Sit with your right leg extended and left foot against your inner thigh. Hinge at your hips, reaching for your right foot or shin. Hold for 5-10 breaths, then switch.
- Pro Tip: Use a strap to maintain a straight spine if your hamstrings are very tight.
- Props: Sit on a blanket to elevate your hips for better alignment.
Comparison of Poses: Which Is Right for You?
| Pose | Difficulty | Best For | Props Needed |
|---|---|---|---|
| Downward Dog | Beginner | Full-body stretch | Blocks (optional) |
| Standing Forward Fold | Beginner | Quick hamstring relief | Blocks (optional) |
| Reclining Hand-to-Big-Toe | Beginner | Gentle, controlled stretch | Strap |
| Half Splits | Beginner-Intermediate | Focused hamstring stretch | Blanket, blocks |
| Wide-Legged Forward Fold | Beginner | Hamstrings and hips | Blocks |
| Triangle Pose | Beginner-Intermediate | Strength and flexibility | Block |
| Seated Forward Bend | Beginner | Relaxing stretch | Strap, blanket |
| Low Lunge | Beginner | Hip and hamstring opener | Blanket |
| Gate Pose | Beginner | Lateral hamstring stretch | Blanket |
| Head-to-Knee Pose | Beginner | Deep, single-leg stretch | Strap, blanket |
Pros and Cons of These Poses
- Pros:
- Accessible to all levels with modifications.
- Improves flexibility, strength, and mental well-being.
- Requires minimal equipment (props optional).
- Cons:
- Progress can be slow, requiring consistency.
- Some poses may feel intense for very tight hamstrings.
- Improper alignment can strain other muscles (e.g., lower back).
How to Practice Safely
To avoid injury, always warm up, listen to your body, and use props for support. Avoid forcing stretches, as this can worsen tightness or cause strains. Practice 3-5 times a week for 10-20 minutes, gradually increasing duration as your flexibility improves.
Warm-Up Tips
- Do 5-10 minutes of dynamic stretches like leg swings or cat-cow.
- Take a short walk to increase blood flow.
- Use a foam roller to loosen muscles before stretching.
Personal Story: My Hamstring Journey
As someone who spent years at a desk job, I know the struggle of tight hamstrings all too well. After long days of sitting, my legs felt like concrete, and bending over to tie my shoes was a workout in itself. I started practicing yoga sporadically, but it wasn’t until I committed to a regular routine—starting with Downward Dog and Reclining Hand-to-Big-Toe—that I noticed a difference. Within weeks, I could touch my toes without wincing, and my lower back pain eased up. It wasn’t magic; it was patience and consistency. Trust me, if I can loosen up my hamstrings, you can too!
People Also Ask (PAA)
What causes tight hamstrings?
Prolonged sitting, intense exercise without stretching, poor posture, and muscle imbalances can cause tight hamstrings. Regular stretching and strengthening help prevent and relieve tightness.
How often should I do yoga for hamstrings?
Practice 3-5 times a week for 10-20 minutes. Consistency is key, but avoid overstretching to prevent injury. Listen to your body and rest when needed.
Can yoga help with lower back pain caused by tight hamstrings?
Yes, yoga poses like Downward Dog and Seated Forward Bend stretch the hamstrings, reducing tension that contributes to lower back pain. Always maintain proper alignment.
Are props necessary for these poses?
Props like straps, blocks, and blankets make poses more accessible and safe, especially for beginners or those with tight hamstrings. They’re optional but highly recommended.
Tools and Resources for Your Yoga Practice
- Yoga Mats: A non-slip mat provides stability. Brands like Liforme and Manduka are durable and eco-friendly.
- Props: Straps, blocks, and blankets are affordable and widely available online or at fitness stores like Gaiam.
- Online Classes: Platforms like Yoga With Adriene offer free, guided hamstring-focused sessions.
- Books: “The Heart of Yoga” by T.K.V. Desikachar provides foundational knowledge for beginners.
SEO-Optimized FAQ Section
How long does it take to loosen tight hamstrings with yoga?
With regular practice (3-5 times a week), you may notice improvements in 4-8 weeks. Progress depends on consistency and your starting flexibility level.
Can beginners do these yoga poses?
Yes, all ten poses are beginner-friendly with modifications like bent knees or props. Start slow and prioritize alignment to avoid strain.
What are the best props for hamstring stretches?
A yoga strap, blocks, and a blanket are ideal. They support proper alignment and make stretches more comfortable, especially for tight hamstrings.
Can tight hamstrings cause other health issues?
Tight hamstrings can lead to lower back pain, knee issues, and poor posture. Yoga helps restore balance and prevent these problems.
Is it safe to do yoga with a hamstring injury?
Consult a doctor first. Gentle poses like Reclining Hand-to-Big-Toe can aid recovery, but avoid intense stretches until healed.
Conclusion
Tight hamstrings don’t have to hold you back. With these ten yoga poses, you can gradually loosen up, move better, and feel great. Start with a warm-up, use props as needed, and practice consistently—your body will thank you. Whether you’re a desk worker, athlete, or just someone who wants to bend over without groaning, yoga is your ticket to happier hamstrings. Grab a mat, take a deep breath, and let’s get stretching!
For more guidance, check out online classes at MyYogaTeacher or explore hamstring-focused sequences at Yoga Journal. Share your favorite stretch in the comments below—I’d love to hear what works for you!